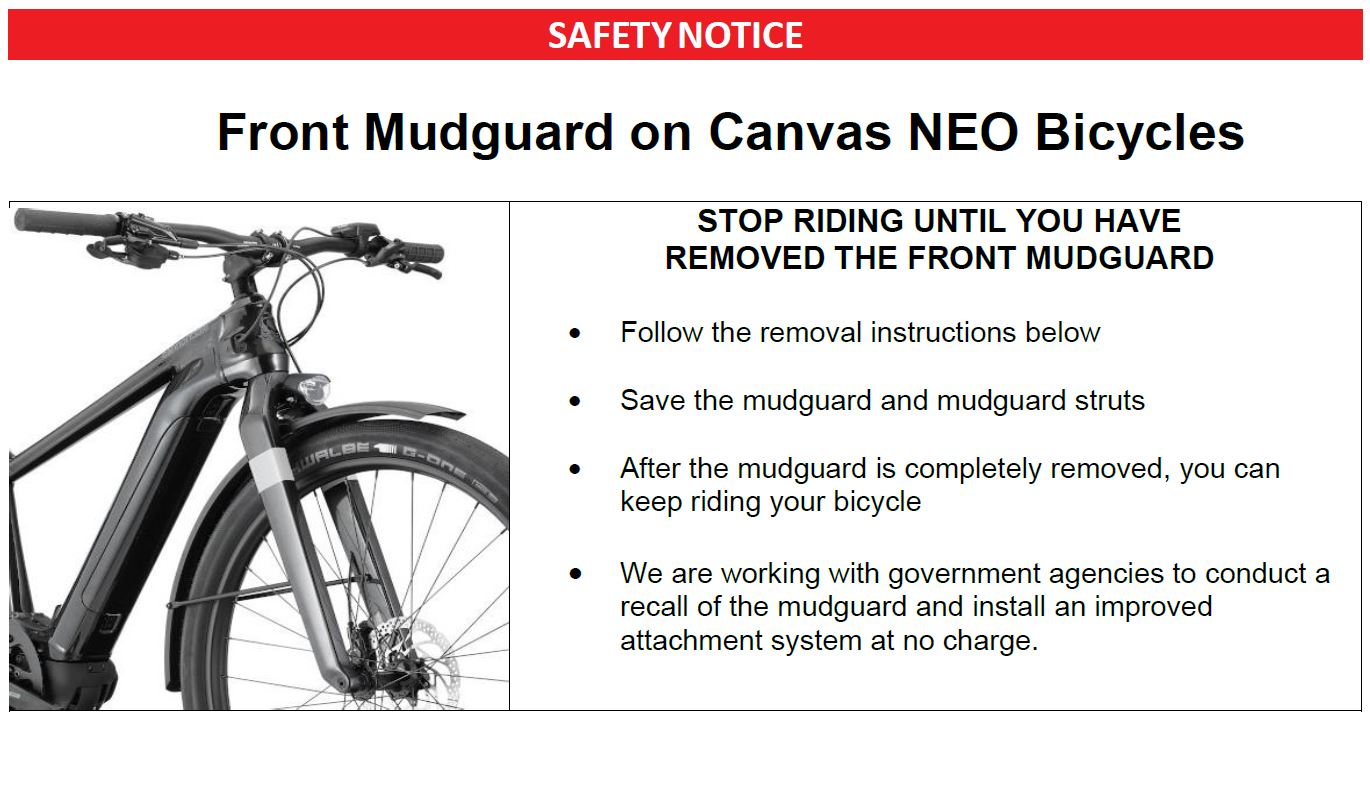
Safety notice: Cannondale Canvas NEO front mudguard
Cannondale has issued a safety notice affecting its Canvas NEO e-Bike platform, on which there is now a concern the front mudguards fitted may be prone to a safety issue.
Consumers with the NEO 1 and NEO 2 e-bikes, or dealers carrying the stock, are now advised to remove the guard and mudguard struts, at which point the bike will be safe to ride again.
If you (or your customer) are already riding the bicycle, once the guard is removed, Cannondale ask that the e-bike is registered at cannondale.com. Doing so will activate the warranty and provide automatic updates on the recall.
Cannondale are working with government agencies to conduct the recall of the mudguard and install an improved attachment system at no charge, which can be supplied via the local stockist.
Questions on the recall can now be directed here.
Mudguard Removal Instructions
Step 1: Remove the front wheel
1A: If possible, put the bicycle into a work stand with the front wheel off the ground. Or, hang the bike by the saddle or lay the bike on its side on a soft surface.
1B: Insert a 5mm hex wrench into the side of the axle marked with “Max 11Nm”. Turn the wrench counter-clockwise until the axle is free to slide out and then slide it out.
1C: Remove the front wheel from the fork. You may need to tap the top of the wheel with the palm of your hand to release the wheel from the fork.
Step 2: Remove mudguard attachment to top of fork.
2A: Remove the cover from the centre mudguard bolt by prying with a small flathead screwdriver (a new cover will be provided, so it is fine if the cover breaks).
2B: Remove the centre mudguard bolt with a 4mm hex wrench (you can discard this bolt – a new one will be provided)
Step 3: Remove the struts attaching the mudguard to the sides of the fork
3A: Remove both mudguard bolts from the mudguard struts (you can discard the bolts – new ones will be provided). Save the mudguard and mudguard struts.
Step 4: Re-install the front wheel
4A: Re-install the wheel into the dropouts and align the hub with the fork dropouts.
NOTE: Ensure the brake disc slides in between the brake pads in the caliper as you insert the wheel between the dropouts.
4B: Insert the thru-axle into the left side fork dropout and through the wheel hub.
4C: Insert a 5mm hex wrench into the side of the axle marked with “Max 11Nm” and turn the axle clockwise to screw the axle into the right-side dropout. Ensure the axle is very tight.
Related: Cycling Sports Group boss explains model year restructure.