How to: Bleeding a RockShox hydraulic remote
By Julian Thrasher, ATG Training 
There can be a number of reasons why a Rockshox Reverb dropper post or fork lockout can stop working, but the most basic reason is air in the remote and hose.
There are a few different types of the Rockshox hydraulic remote lever, the ones with gold adjusters are the XLoc type used on the fork and rear shock lockouts and the black (or silver) adjuster types are the speed adjusters used on the Reverb dropper post.
The remote bleed process is basic, but there are a few extra tips we’ve found that can assist the procedure.
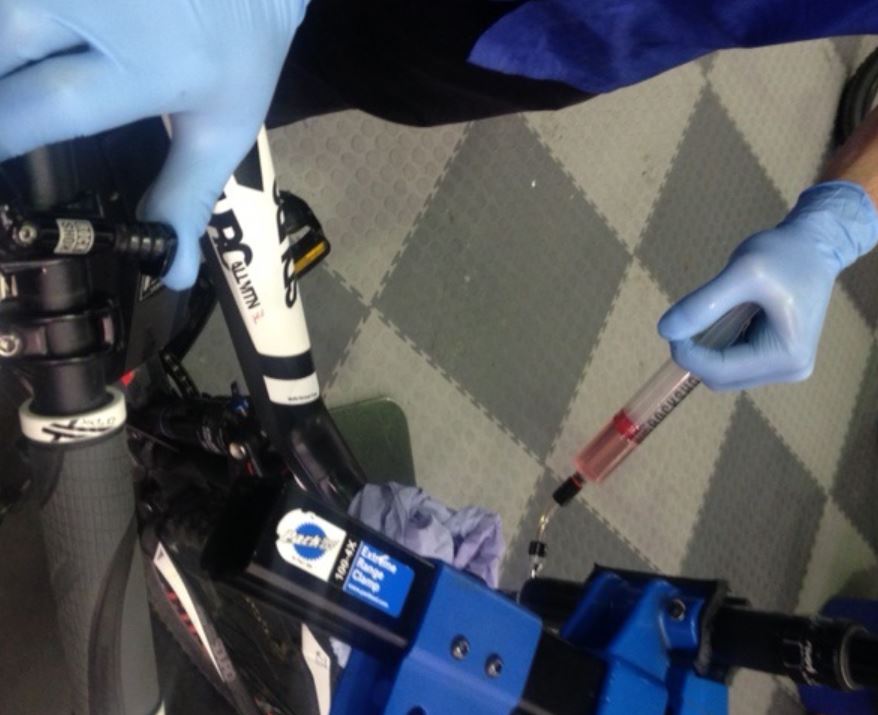
Tools required: Safety glasses, Nitrile gloves, Reverb bleed syringes, T10 and T25 Torx keys, Rockshox Reverb oil (or 3wt) Blue cloth and a drip tray.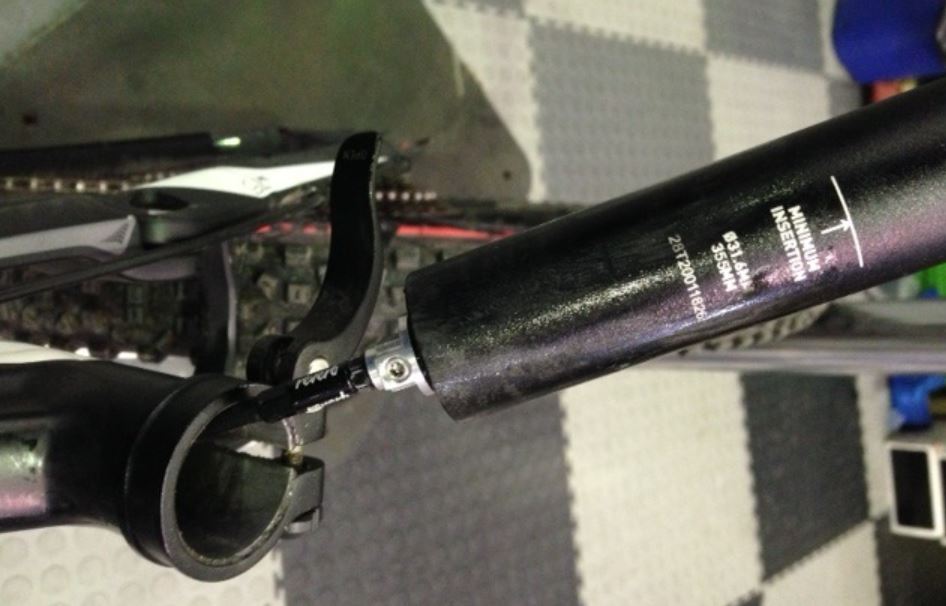
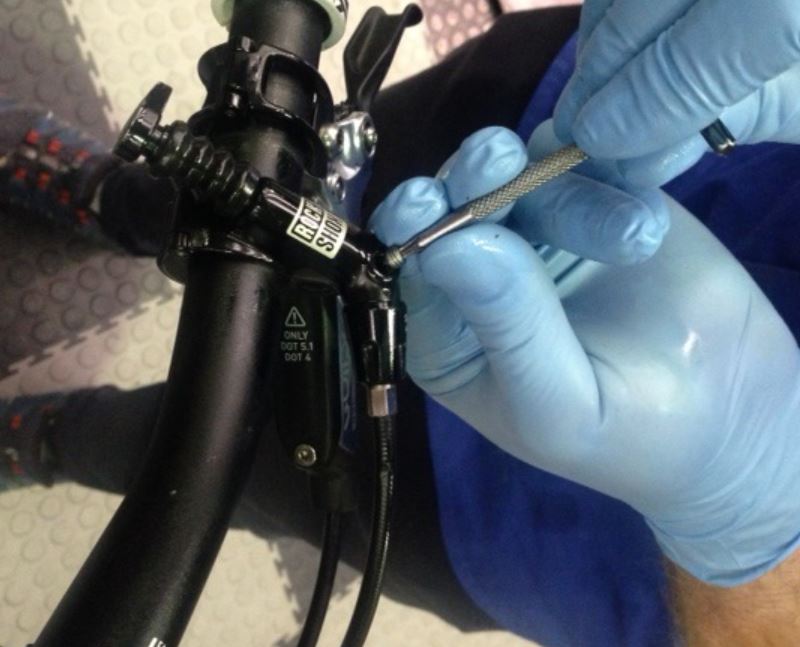
- You will need to remove a Reverb Stealth dropper to access the bleed screw. Make sure the bike is supported throughout the procedure. If you can, lower the workstand to hold the post. If the Reverb is an external type, then move the clamp to position the remote higher than the bleed screw. XLoc remotes will naturally be higher than the lever bleed screw.
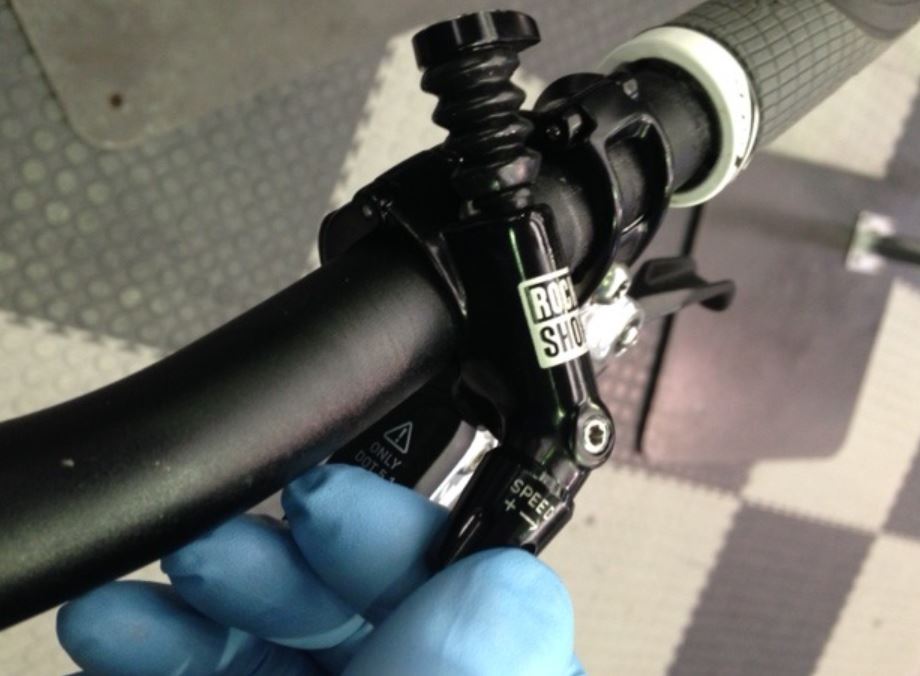
- Use a T25 Torx key to position the remote so that the bleed screw is slightly higher above the lever.
- On the XLoc remotes it’s important that the lever is in the fully extended position. Reverb remotes should naturally rest in this position.
- The instructions will tell you to turn the adjuster so that it is wound
fully out giving maximum volume to the remote (in the direction of the arrow for the XLoc – in the opposite direction of the arrow for the Reverb) we have found some good results by winding the adjuster all the way in (the reverse to what the instructions say) If by following the instructions you find the post only to extend in the
fully fast position and be locked solid in the full slow position, then repeat the procedure with the adjuster in full fast (Reverb).
- Fill one
 syringe ¾ full of Reverb oil and the other a ¼ full.
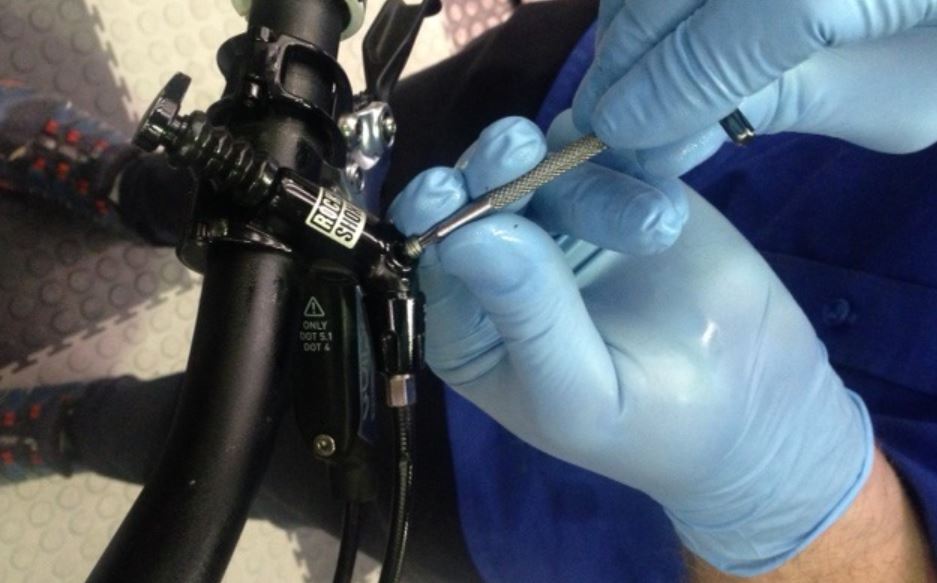
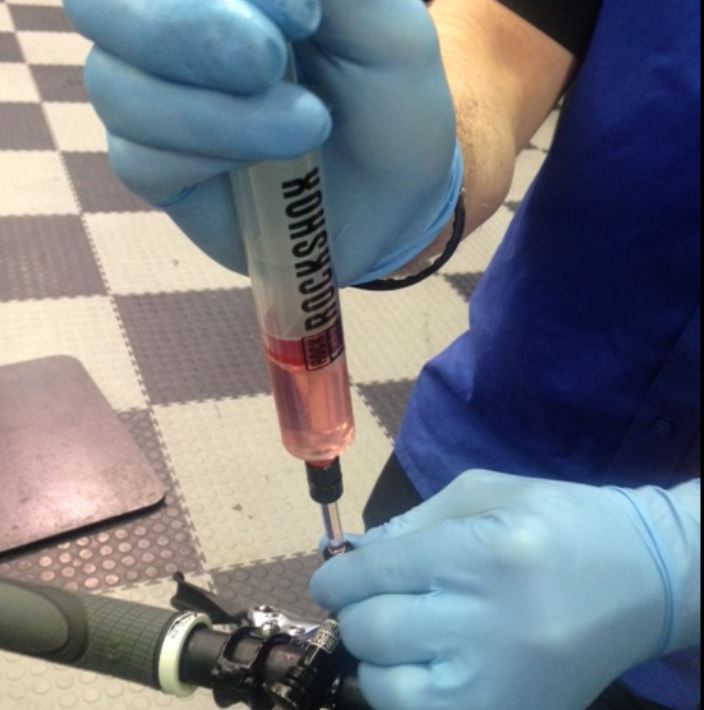
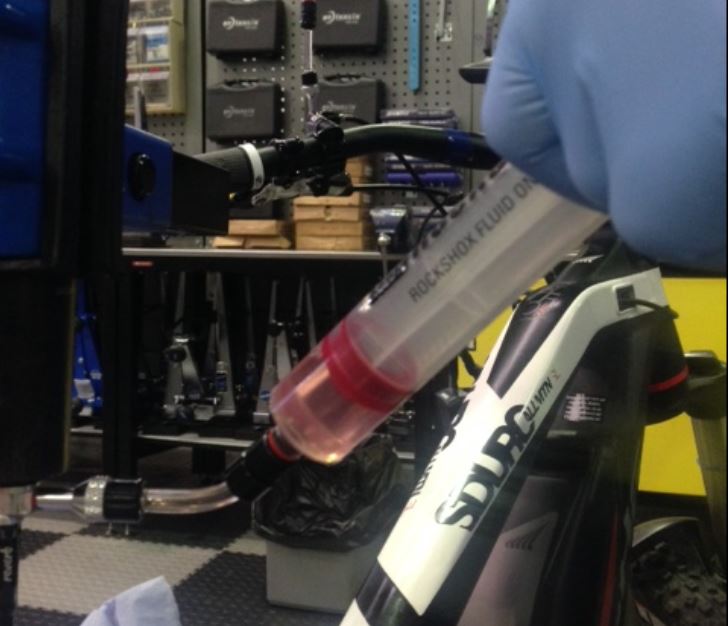
- Remove the bleed screw on the post or crown lockout and thread in the ¾ full syringe.
- Remove the bleed screw on the remote and thread in the ¼ full syringe.
- Cycle the oil between the two syringes. This will purge the air from
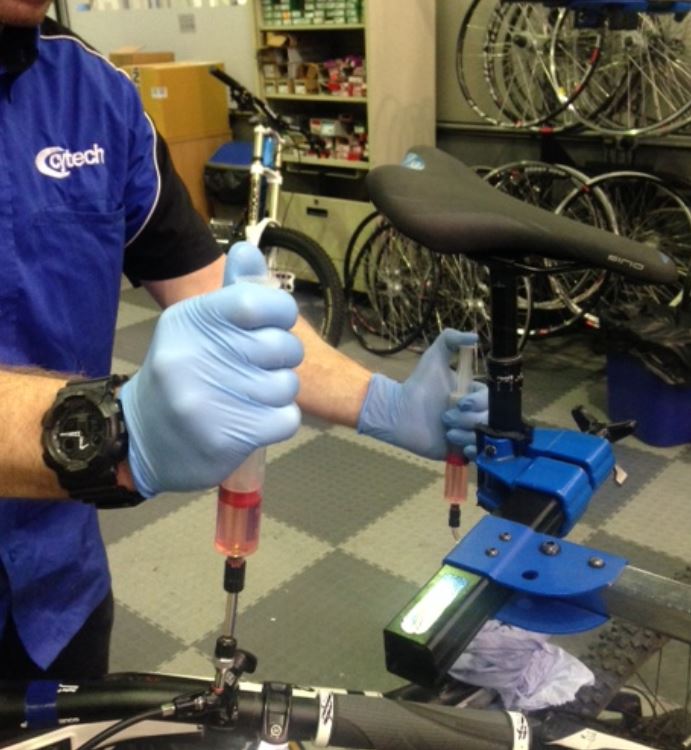 the system. You will find pressing gently on one syringe whilst pulling gently on the other syringe achieves the best results. Continue until no more air bubbles emerge from the system. If the oil is severly discoloured you will need to remove the syringes, dispose of the old fluid and refill and repeat the process until the oil runs clear and free of air in both syringes.
- Balance both syringes so they are ½ full.
- Remove the crown or post syringe and thread in the bleed screw.
- Press down on the remote syringe to
 ensure the lever is fully extended and then push the lever whilst gently pulling on the syringe. This should dislodge any remaining air bubbles in the remote.
- Give the remote syringe a final press and let the plunger pop back up on its own. Unthread the syringe and replace the bleed screw.
- If the system has been correctly bled then the remote lever should be solid to the press and not extend when pulled.
- If the lever does then there may well be air still in the system. Unscrew the post or crown bleed screw and thread in a ½ full syringe. Push on the syringe and feel the remote lever become solid. Press the syringe and allow the plunger to return on its own.
- Unthread the syringe and ensure there is a pool of oil in the bleed port. Thread in the bleed screw.
- Function test the system to ensure
 successful operation.
- Wipe off any remaining oil from the remote and post and return the remote and post to the riders desired position.
Hopefully by following this procedure your next hydraulic remote lever bleed should go a lot more
smoothly.
Happy spannering!